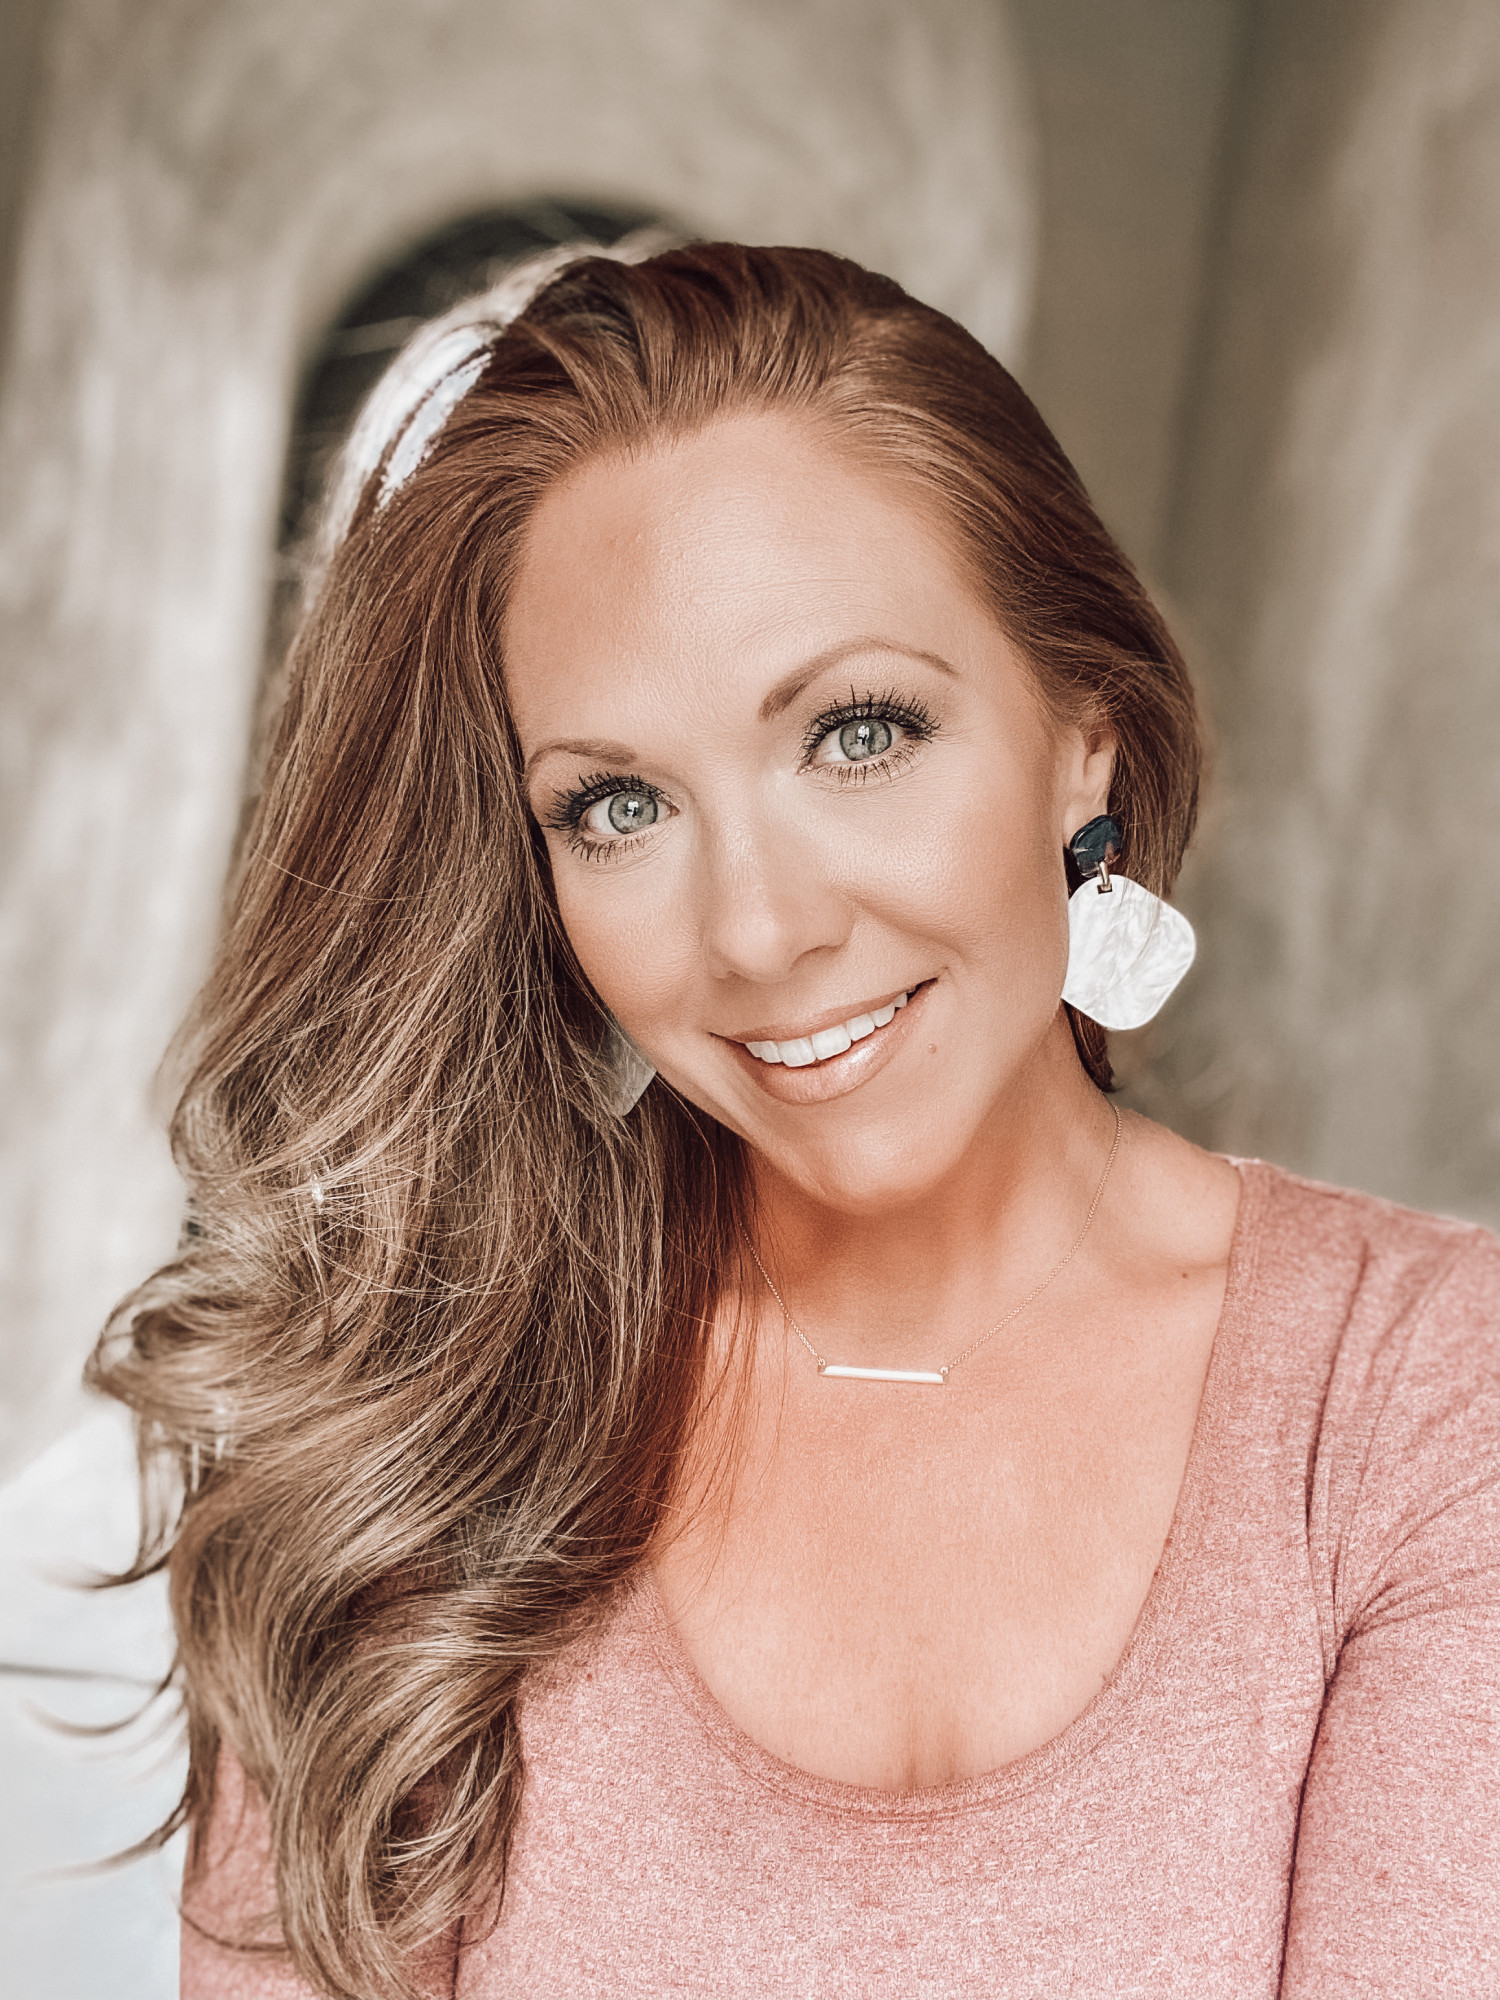
MY FULL FACE DAILY MAKE-UP ROUTINE 🖤
Hey there loves! If you have followed me for a bit it probably won’t come as a surprise to you that I LOVE make-up and I do.it.up most days of the week. And it doesn’t take me long. Maybe 20 min? Give or take. Some would say it’s over-kill but I love how it makes me feel more confident! And let’s be honest, it looks way better when I cover these dark circles under my eyes 👀💁🏼♀️. (◀️ Side note, can we get a red-headed emoji, please? 😬😆) Below I have added, in order of use, the make-up and tools I use every day. I hope you can find all or some of this helpful too! If it would be helpful and you’d like me to add a video tutorial, drop me note!
MAKE-UP
- TULA Skincare Face Filter Primer
- Gentle Cover Concealer Stick | I use the color YELLOW
- e.l.f. 16HR Camo Concealer/ Brightener | I use the color FAIR WARM
- It Cosmetics CC+ Cream | I use the color LIGHT MEDIUM
- Cover|FX Power Play stick concealer | I use the color N LIGHT 1
- Lancome Paris Loose Setting Powder | I use the color TRANSLUCENT
- Tarte Bronzer | I use the color PARK AVE PRINCESS
- Lancome Paris Blush Subtil (I use the color APLUM) | OR | BECCA Blush & Glow Palette. I honestly use both. The Lancome for day use and the BECCA Palette more for evening use as it does have a slight sparkle to it. Unless I need a more dramatic daytime look 🤩
- BECCA Palette Highlighter | apart of the above mentioned BECCA Blush & Glow Palette 😉
- Anastasia Beverly Hills Brow Definer | I use color AUBURN
- Anastasia Beverly Hills Base Eyeshadow and HERE | I use the color VERMEER
- Urban Decay Eyeshadow | I use colors CHASE, YDK, & TWICE BAKED
- Laura Mercier Eye Pencil | I use color BROWN COPPER
- L’OREAL Voluminous Curved Brush Mascara OR get it HERE | I use color BLACK
- Charlotte Tilbury Pillow Talk Lip Liner | I use the color PILLOW TALK ORIGINAL
- Revlon Lipgloss | I use color SNOW PINK in this brand OR Tom Ford Gloss Luxe | I use color CRYSTALLINE in this brand
- Farsali Setting Spray | this is by far my fave setting spray that I have tried!
TOOLS
- Beauty Blender or if you like a foundation brush better I have this one and it is awesome!
- Trish McEvoy Beauty Brushes | These brushes are on the pricier side, but, they are well worth the money in my opinion. You won’t have pieces of hair falling out all the time and sticking your in the face! And they will last you FOR-ever! These are the brushes I have specifically here, here, here, here, here, & here. I will say that I do also have a fave less expensive brush set. It’s the “It Cosmetic” brushes! Our daughter uses these and I help her with her makeup most days. And I love them too!
HOW I APPLY
- First, I add the primer to my face as a base for my foundation. This allows my foundation to go on smoother and last longer! It can also help smooth any fine lines, wrinkles or larger pores.
- I then add the gentle cover concealer to my under-eye! Hence the dark circles mentioned above. I need to cover-up these bad boys! I have used this product for more years than I can count. It really does help to hide my under-eye imperfections underneath my main concealer. I just dab this on with my beauty blender or my ring finger. Either way works for this step.
- After applying the last step, I then apply my under-eye brightener on top of the gentle cover (yellow tinted) concealer that I mentioned in step 2. I also add a few dots of this in a “V” shape on my cheeks and blend it in. This will brighten the area under your eyes and will also, if you have any under-eye imperfections, will help to fade away/blend them in down the cheeks.
- My next step is to add my “It Cosmetics” CC Cream to my entire face. This helps to reduce any redness that I may have and evens out my skin-tone overall. As an added bonus, this also contains SPF 50+!
- I then add my Cover|FX concealer under my eye area and eye lids and blend it in with my fave beauty blender.
- Now I set my makeup with my loose powder. I love this brand because, unlike others I have used, the is truly translucent and not thick or cakey at all! I use the larger end of my beauty blend dab it on my face and around my eyes. (I have found that this way is way less messier then trying to use a powder brush)
- I then add my Tarte Bronzer to my entire face to give a little color back into my skin and to give it that overall sunkissed glow. Once I’ve finished that step, I take the BECCA Palette and use the bronzer to contour my face. Then adding blush (this for day & this for night) to my cheeks for a rosy finish, and the highlighter from the BECCA Palette mentioned above. (have to use the highlighter🤩)
- After I have finished my base I add my eye shadow (here in Vermeer & here in colors CHASE, YDK, & TWICE BAKED), eyeliner in brown copper, brow definer in Auburn and mascara in black.
- To finish off my look I line my lips with Charlotte Tilbury’s Pillow Talk Lip Liner in the “Orginal” color and add one of my fave glosses here & here. They are both very pretty neutral colors.
- Once that is complete I give a spritz to my face with my setting spray and voila. My daily look 🙂
I always keep this in my purse, for any touchups throughout the day | I use color 820 LIGHT.
xo,
Sherri
